TCS POS GL Interface for Transfers and Physical Inventory adjustments
TCS POS GL Interface
There are 3 additional programs to be used for the posting of GL entries.
Like the current G/L Journal Entry programs in POS.23.29.
These new programs will post inventory adjustments made through the inventory transfers programs or through the physical inventory process.
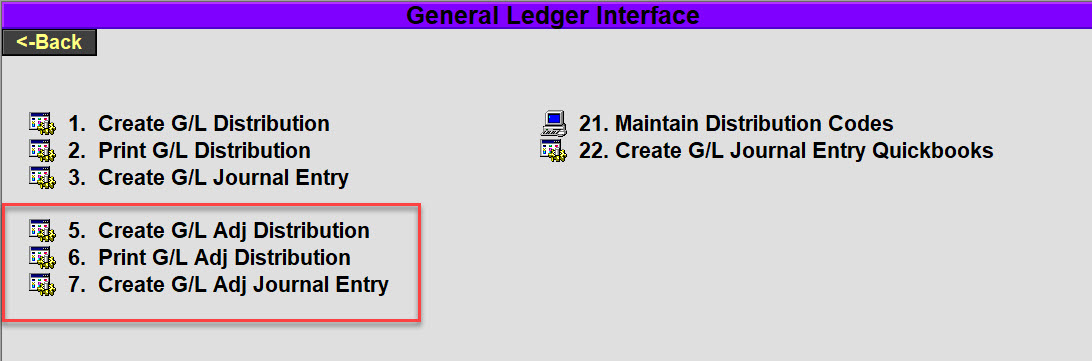
- Create G/L Adj Distribution
- Print G/L Adj Distribution
- Create G/L Adj Journal Entry
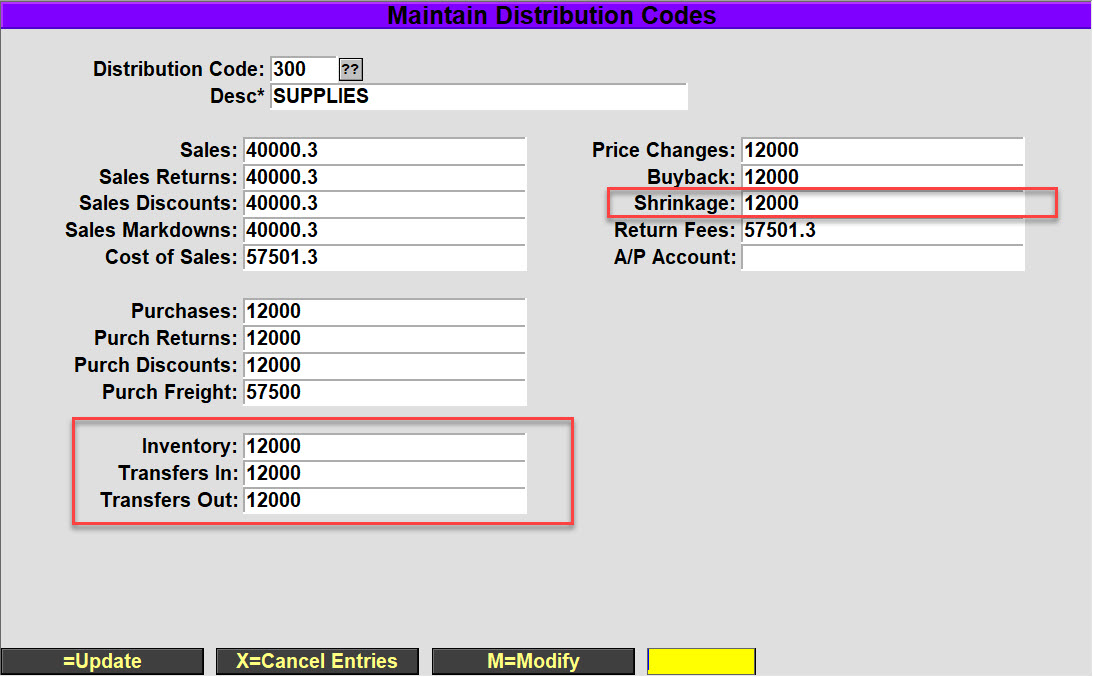
These programs will use the GL codes that are defined in the Maintain Distribution Codes (POS.23.29.21). The inventory transfers will use the Inventory and the Transfers in/out and Physical Inventory will use the Shrinkage GL codes that are setup here, please make sure that you have these fields setup for each distribution code that you are using for Inventory.
First, create the G/L adjustment records, select the Create G/L Adj Distribution program and enter the beginning and ending dates then answer the prompt if this is a repost of the GL.
Next, you can print the G/L adjustments by selecting the Print G/L Adj Distribution menu option.
- Enter a store number if you wish to limit the report to only a specific store
- Enter the beginning/ending dates to report on.
- Select the ‘Summary’, ‘Detail’, or ‘Errors’ to report on.
- Enter a specific G/L account number if you only want to report on that one account.
- Select R=Run Procedure to create the report.
To post the records to the accounting, select the Create G/L Adj Journal Entry menu option.
- Enter a store number if you want to limit the process to only a single store, otherwise leave the field blank.
- Enter a beginning/ending date range to process for.
- Enter in the Accounting period to use.
- Select R=Run Procedure to complete the process.