SHIP ENGINE PROCEDURES
SHIP ENGINE PROCEDURES
There is a new menu option in POS for the Ship Engine interface.
Contact Total Computing Solutions Sales to setup an account with Ship Engine.
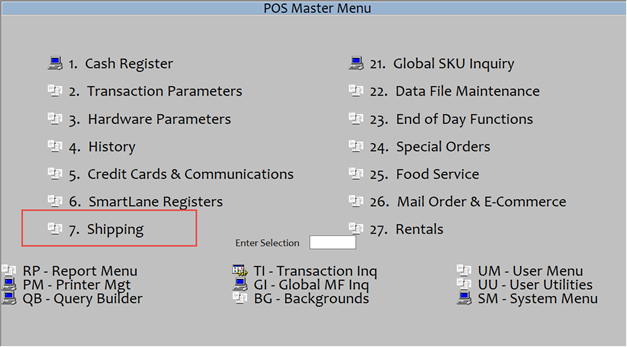
Menu option #7 for Shipping.

Select option #21 for Shipping Parameters.
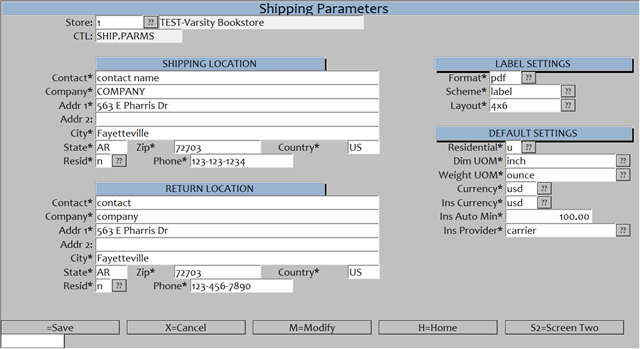
In the Shipping Parameters,
- fill out your company Shipping Location and Return Location information
- Enter your label settings
- Format select from
- Png
- Zpl
- Scheme settings
- Label
- QR_Code
- Layout
- 4 X 6
- Letter
- Default Settings
- Residential
- Y-Yes
- N-No
- U-Uknown
- Dim UOM
- Inch
- Centimeter
- Weight UOM
- Ounce
- Pound
- Gram
- Kilogram
- Currency
- USD
- CAD
- AUD
- GBP
- EUR
- NZD
- Ins Currency
- USD
- CAD
- AUD
- GBP
- EUR
- NZD
- Ins Auto Min – enter the minimum value to incur insurance charges.
- Ins Provider
- None
- Carrier
- ShipSurance
- 3rd Party
- Select the S2 = Screen Two to fill out you Ship Engine ID information
- Residential
- Format select from
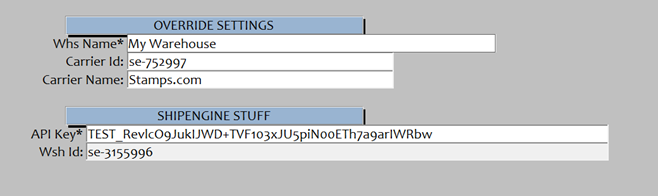
Enter in your Whs Name, Carrier ID, Carrier Name, fi you enter in a specific carrier ID and Carrier Name then when you select to view shipping results you will only see the results for that specific shipper. Leaving this field blank will make it so that when you view the shipping results you will see the results for all carriers (stamps/usps, UPS, FedEx).
Ship Engine Stuff with the API KEY assigned by Ship Engine.

Select #1 Shipping to enter in you shipping information for specific transactions

Select store number that you are shipping for, leave as 1 if you only have one store.
Ship# – Enter in the transaction information to select a transaction or a ‘.’ for manual shipment record.
- ‘.’ – to manually create shipment record
- CONF;### – to create shipment record from POS Transaction by confirmation #
- POS;xxxx – to create shipment record from POS Transaction.
- PC;xxxx – to create shipment record from Pref Customer look up.
- AR;xxxx – to create shipment record from A/R Customer look up.
- ### – to pull up existing shipment record.
- XO;### – to search for shipment records using confirmation #.
- XN;xxxx – to search for shipment records using name.
After entering the information for an existing transaction then the Name, Addr, information will be populated from the transaction, if you manually create a ship# then you will have to fill out the information as seen below.
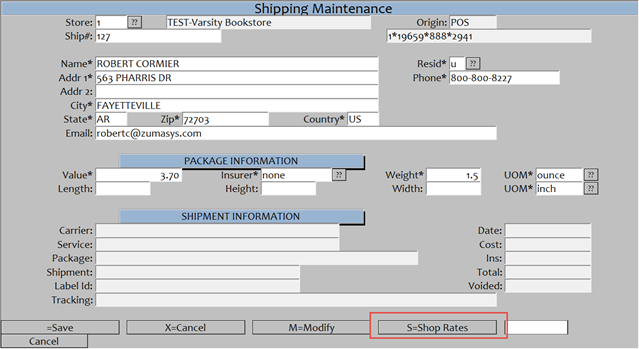
Once all of the information has been entered, select the S=Shop Rates to see the shipping options.
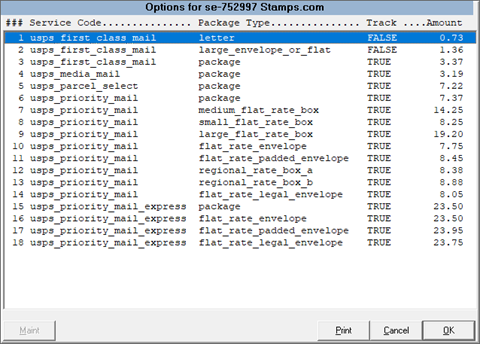
Choose from the displayed shipping rates the one that you would like to use for this shipment. Please note that some of the options allow for tracking while others do not.
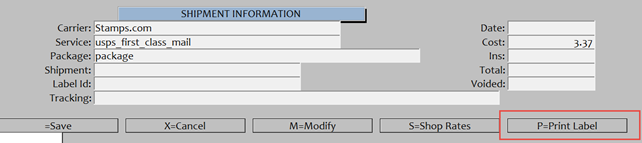
After selecting a shipping option there will be an option P=Print Label. After selecting this option, you will see a new popup window, as seen below, you will highlight and copy all of the information in the ’URL’ field and past that in to a browser window to bring up a window to print the shipping label.

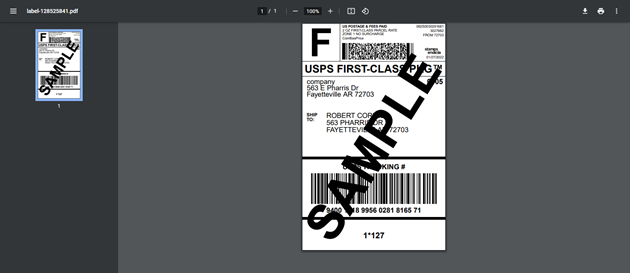
The browser window will open with the option to print the label as seen above.

After printing the label, all of the tracking information will be displayed in the ‘Shipment Information’ section of the window, you have the option to R=Reprint Label or VO=Void Label, you can reprint the label as many times as you need.

At the end of the day when shipping has been completed, select #2 the Shipping EOD option to finalize you shipping manifest.
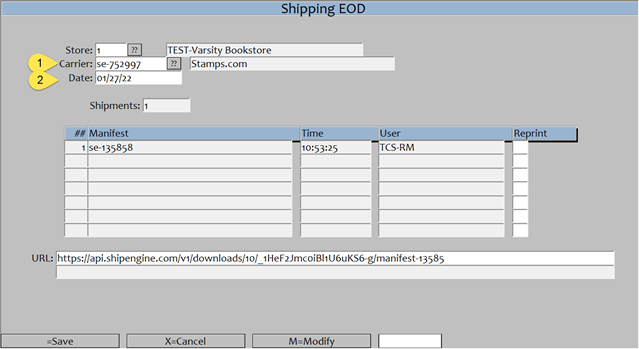
From the ?? Button select the Carrier option and the date then select the C=Create Manifest option when the manifest is created you will see the manifest # above.
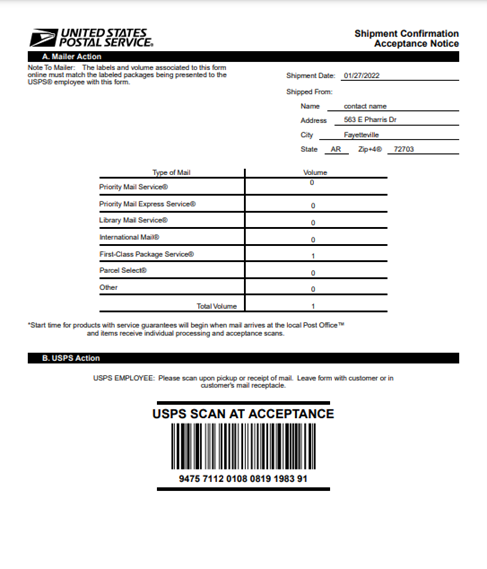
Copy the URL field and paste that in to a browser window to get a copy of the shipping manifest. Below is an example of what you should see for the stamps.com/usps shipper.